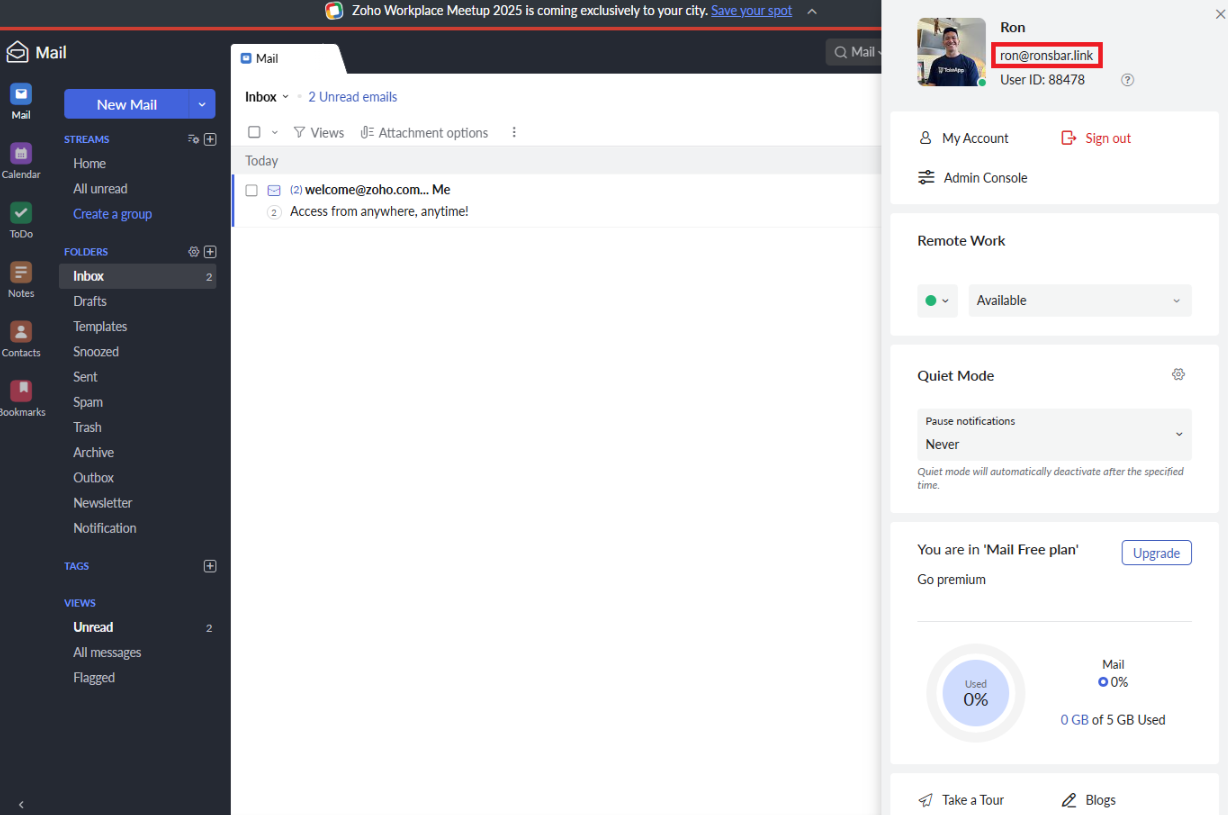
If you purchased your custom domain from Take App, you can create a custom email address by connecting your newly purchased domain to a third-party email platform (e.g., Zoho Mail).
How to set your custom email address in Take app
-
Sign up for Zoho mail using any email you own (e.g., Gmail account)
-
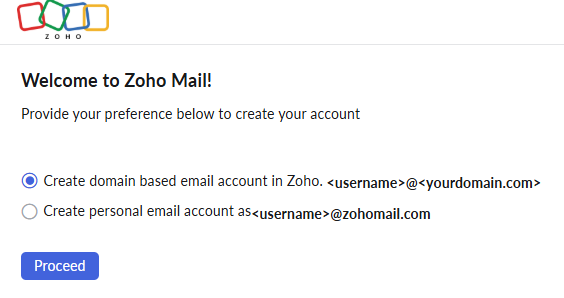
Choose "create domain based email account in Zoho"
-
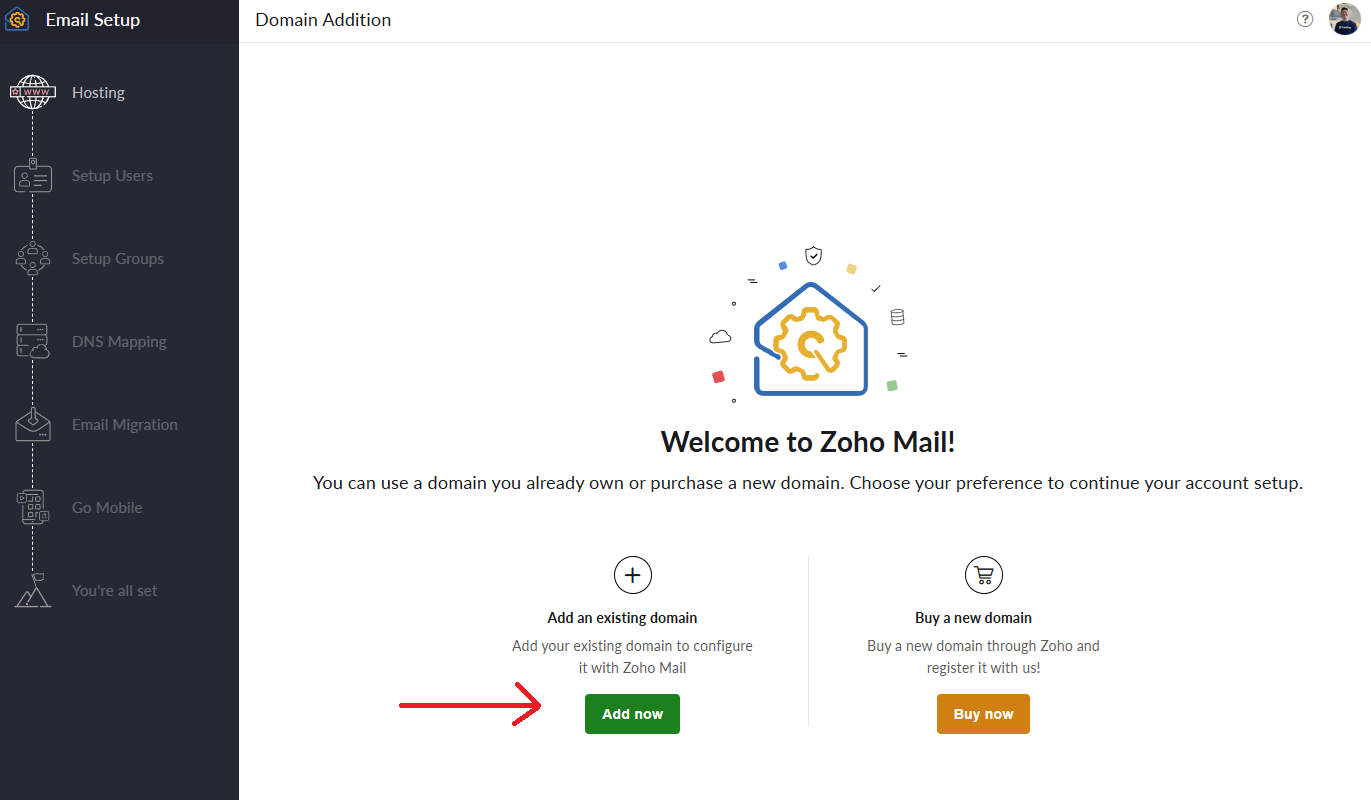
On Hosting, click on "add an existing domain"
Then fill in your domain detail (type in the domain that you have purchased in Take App)
-
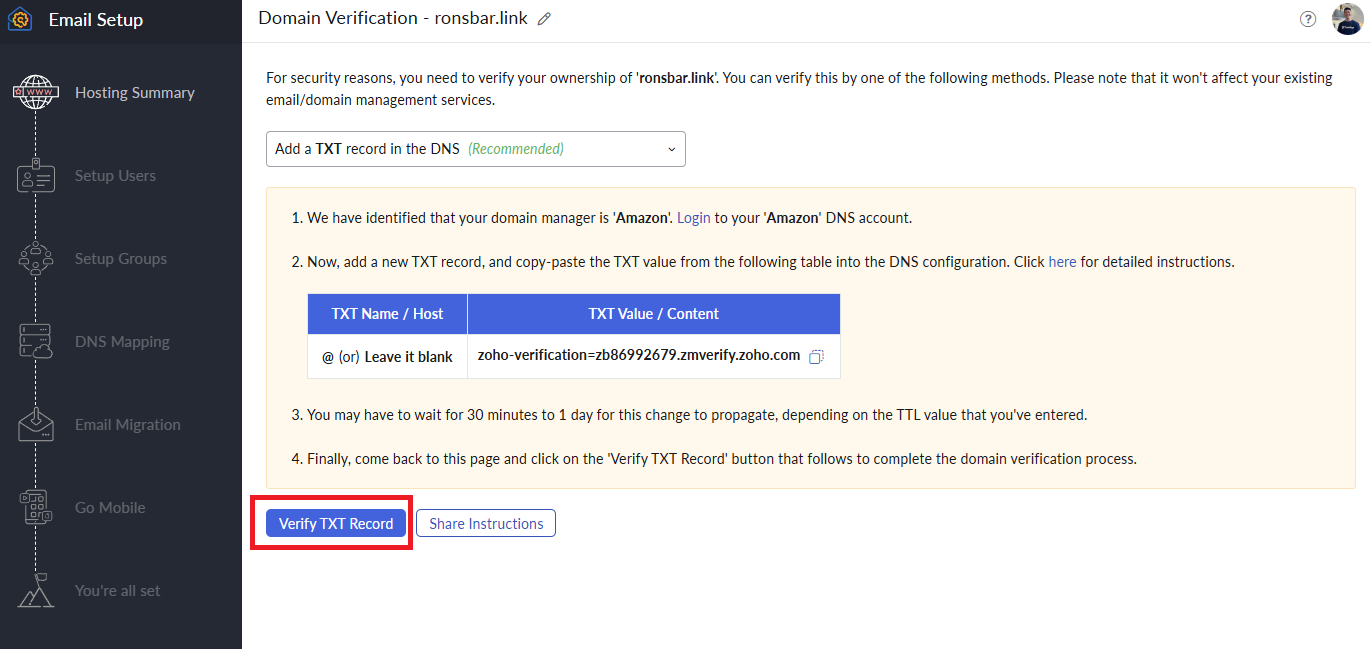
Copy the TXT value from Zoho
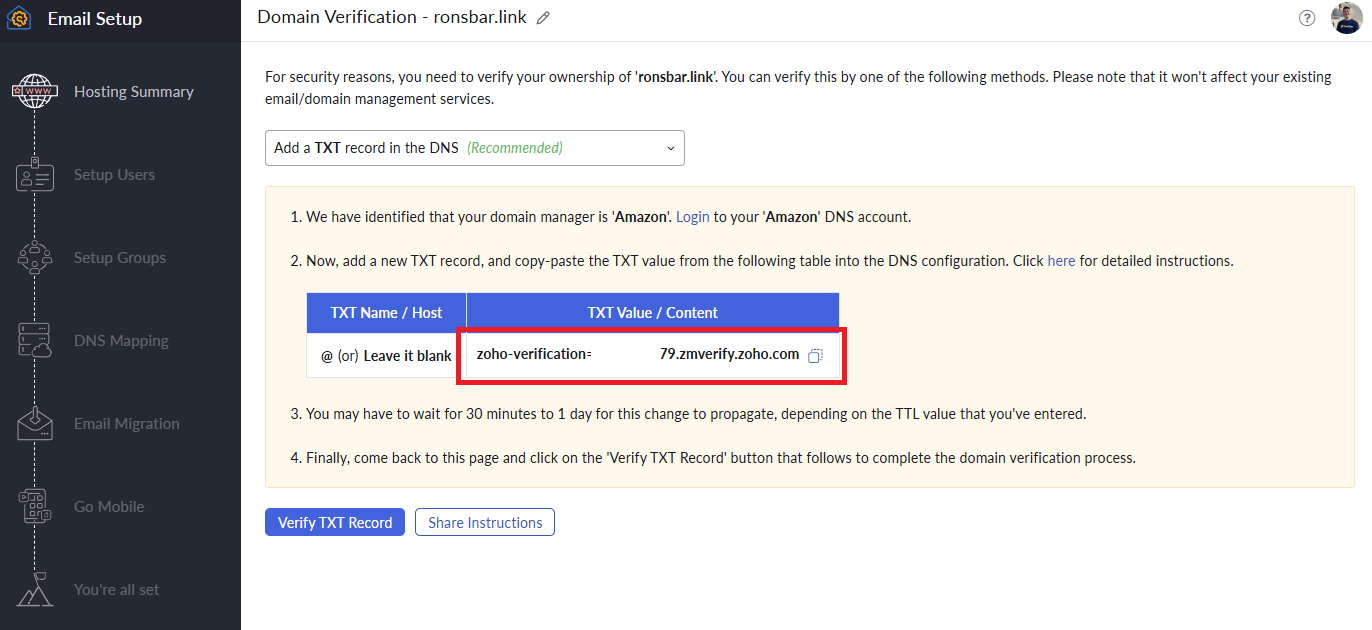
Then paste the TXT value into your custom domain on Take App's Settings > Domain > Click on the domain
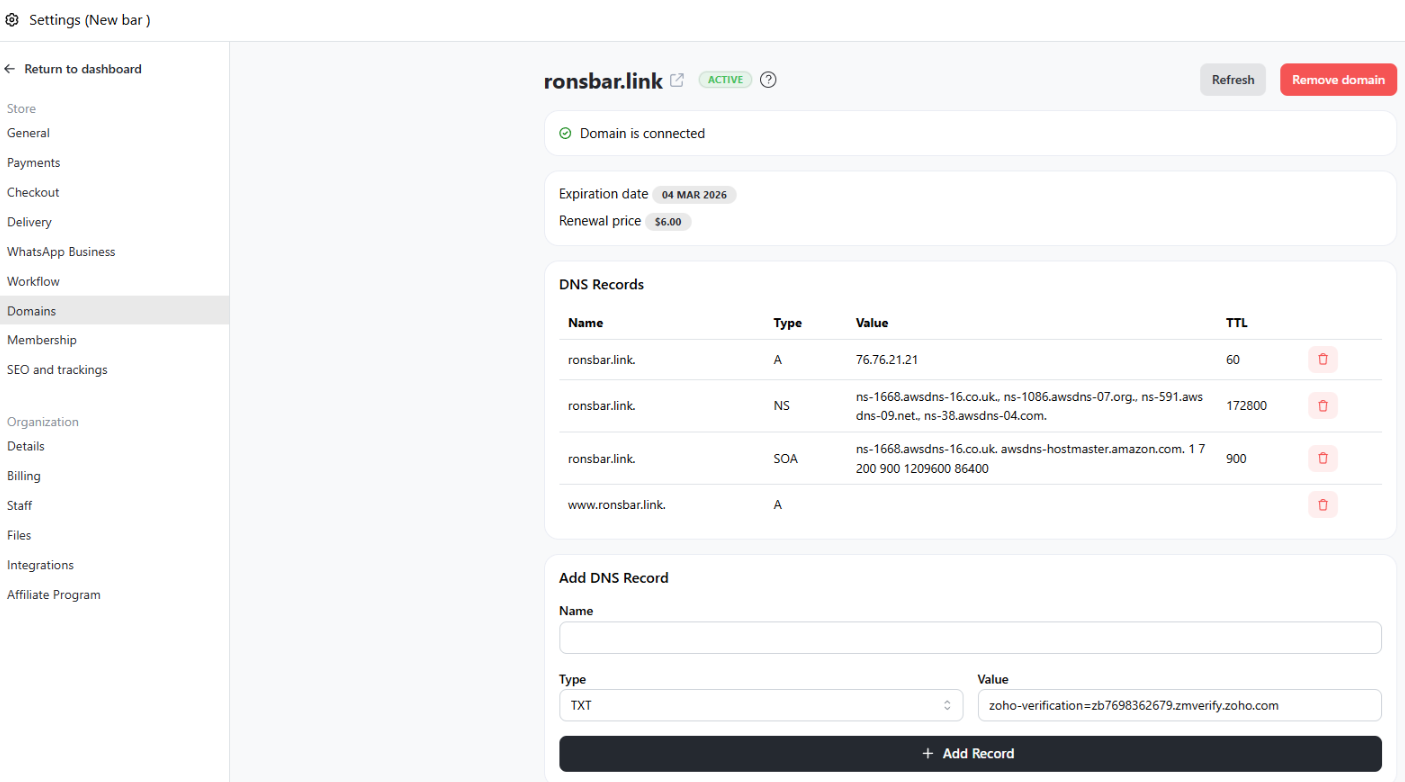
Name: leave it blank
Type: TXT
Value: Paste the Zoho TXT value (e.g.zoho-verification=zb7698362679.zmverify.zoho.com)
Lastly, click "+ Add Record" -
Go back to Zoho mail configuration and click "verify TXT record"
-
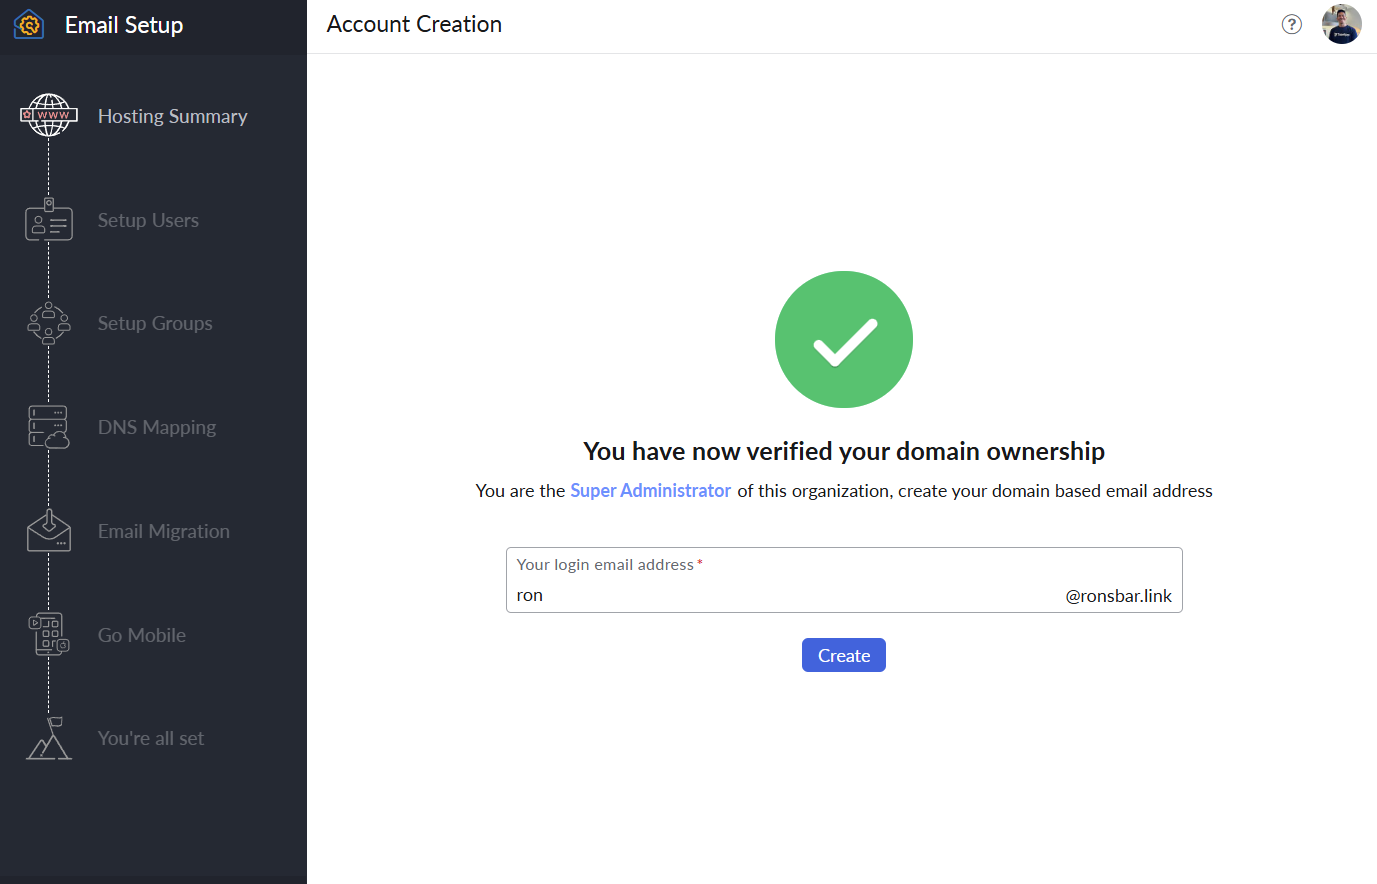
Create your super admin email address in Zoho
-
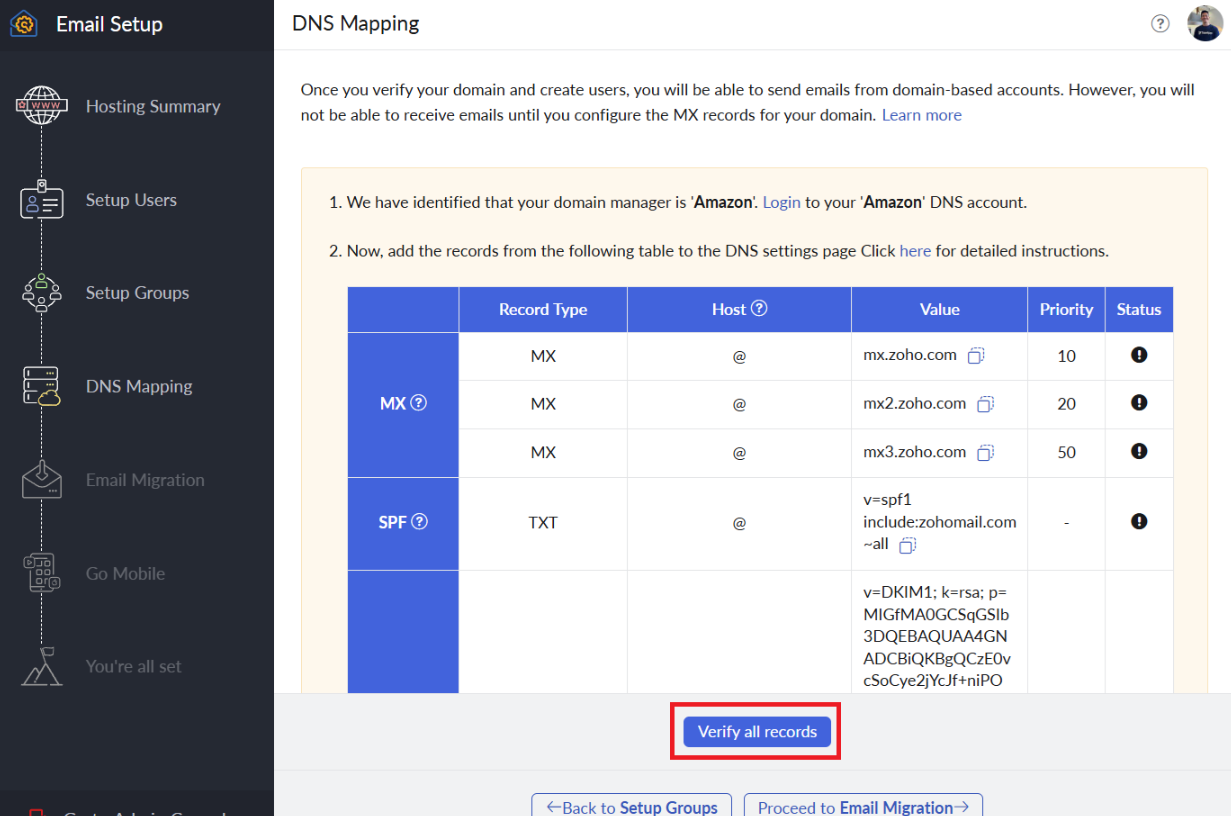
Skip all the steps until DNS Mapping and only copy the MX record (ignore SPF and other records)
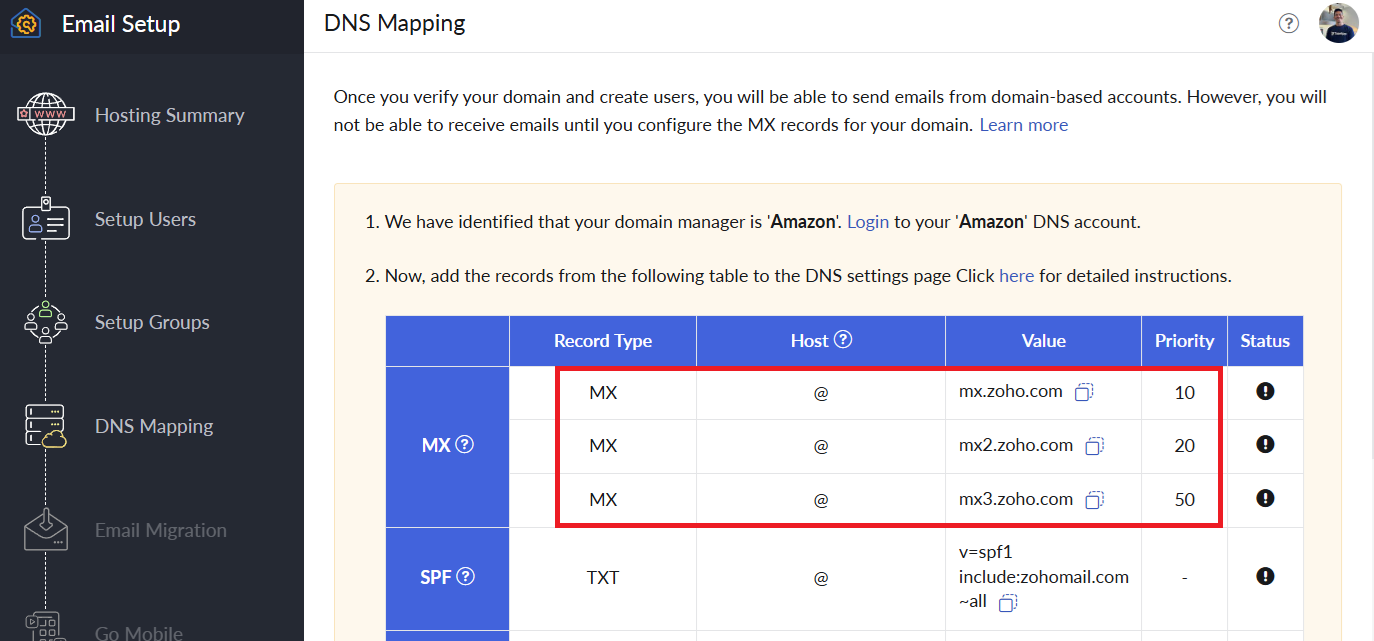
Then paste the MX value into your custom domain on Take App's Settings > Domain > Click on the domain
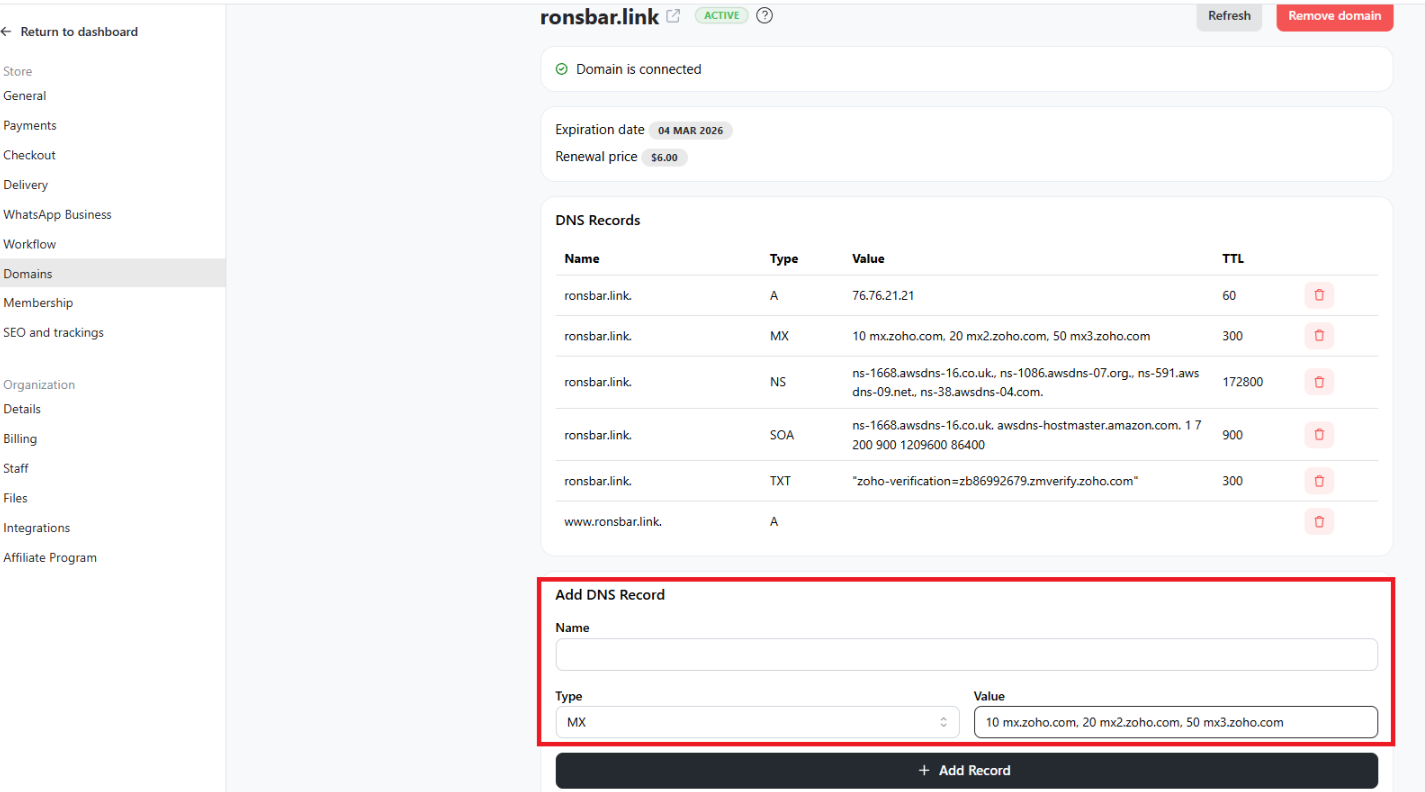
Name: leave it blank
Type: MX
Value: Paste the Zoho MX value (e.g.10 mx.zoho.com, 20 mx2.zoho.com, 50 mx3.zoho.com)
Lastly, click "+ Add Record" -
Go back to Zoho mail configuration and click "Verify all record"
-
Continue or skip all other step and click "check out your inbox" at the end
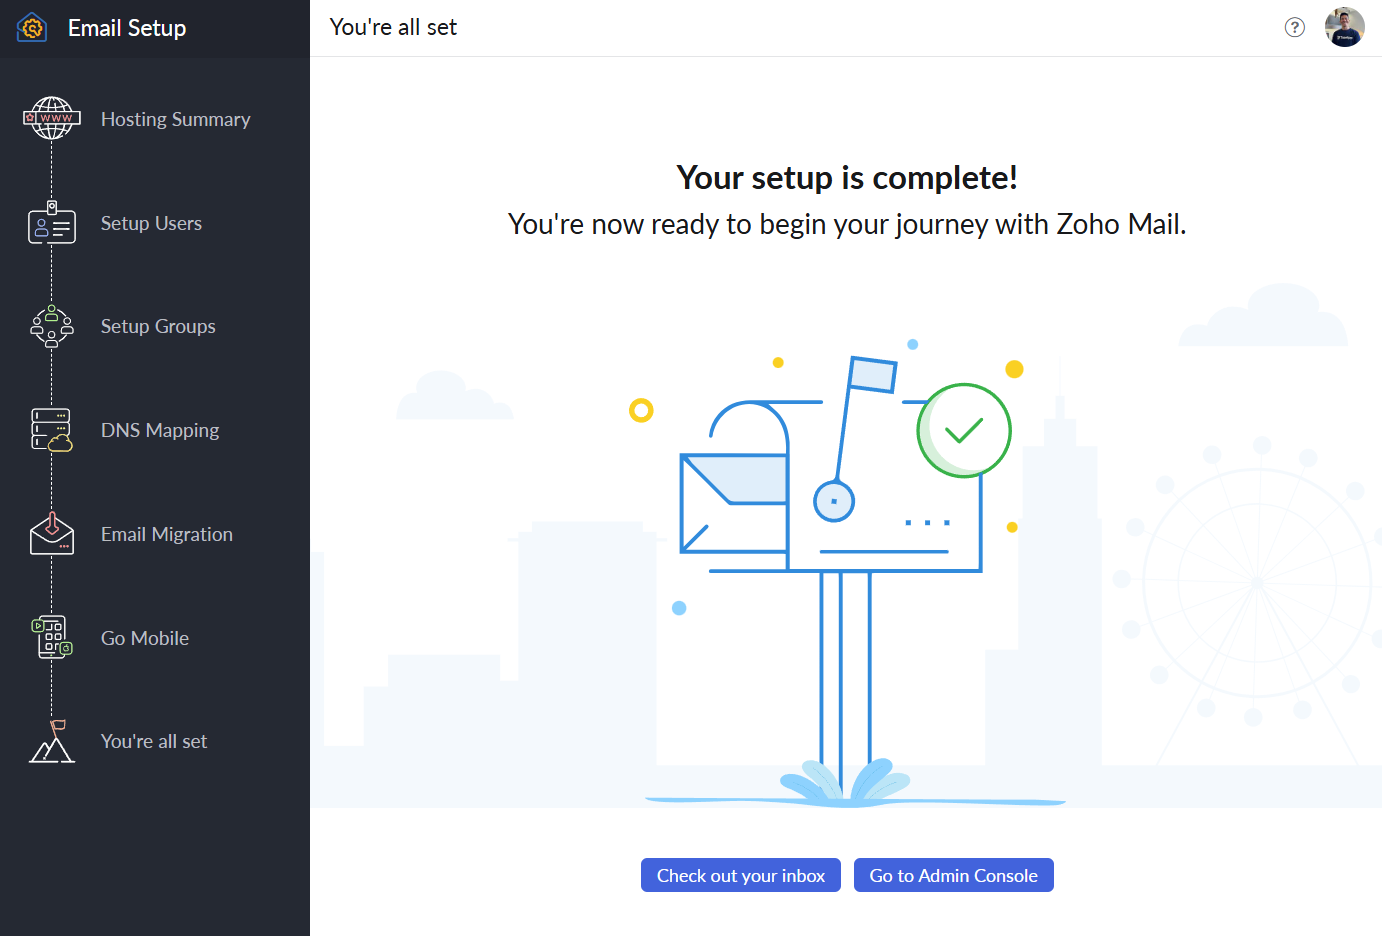
Now your domain-based email is ready to use