
Dine-in Ordering (previously called QR Ordering) gives you one QR code that customers scan at your offline store to open your menu and place an order. Print it or display it anywhere customers are: entrance, counter, pickup area, retail shelf, or open seating. You can also create a QR code per table, so orders arrive tagged with the table they were placed from.
Dine-in Ordering is currently in Beta. In Admin, Dine-in is a group with QR ordering and Reservations. Ordering QR and TV live under QR ordering. For now, orders use Pay at counter only.
Get your ordering QR code
- Go to Admin > Dine-in > QR ordering.
- Under
Ordering QR, clickDownloadto save the QR code image, orOpen linkto preview the menu first. - Print the QR code or display it where customers can scan it.
| Order items list | Review order | Order placed | My orders page |
|---|---|---|---|
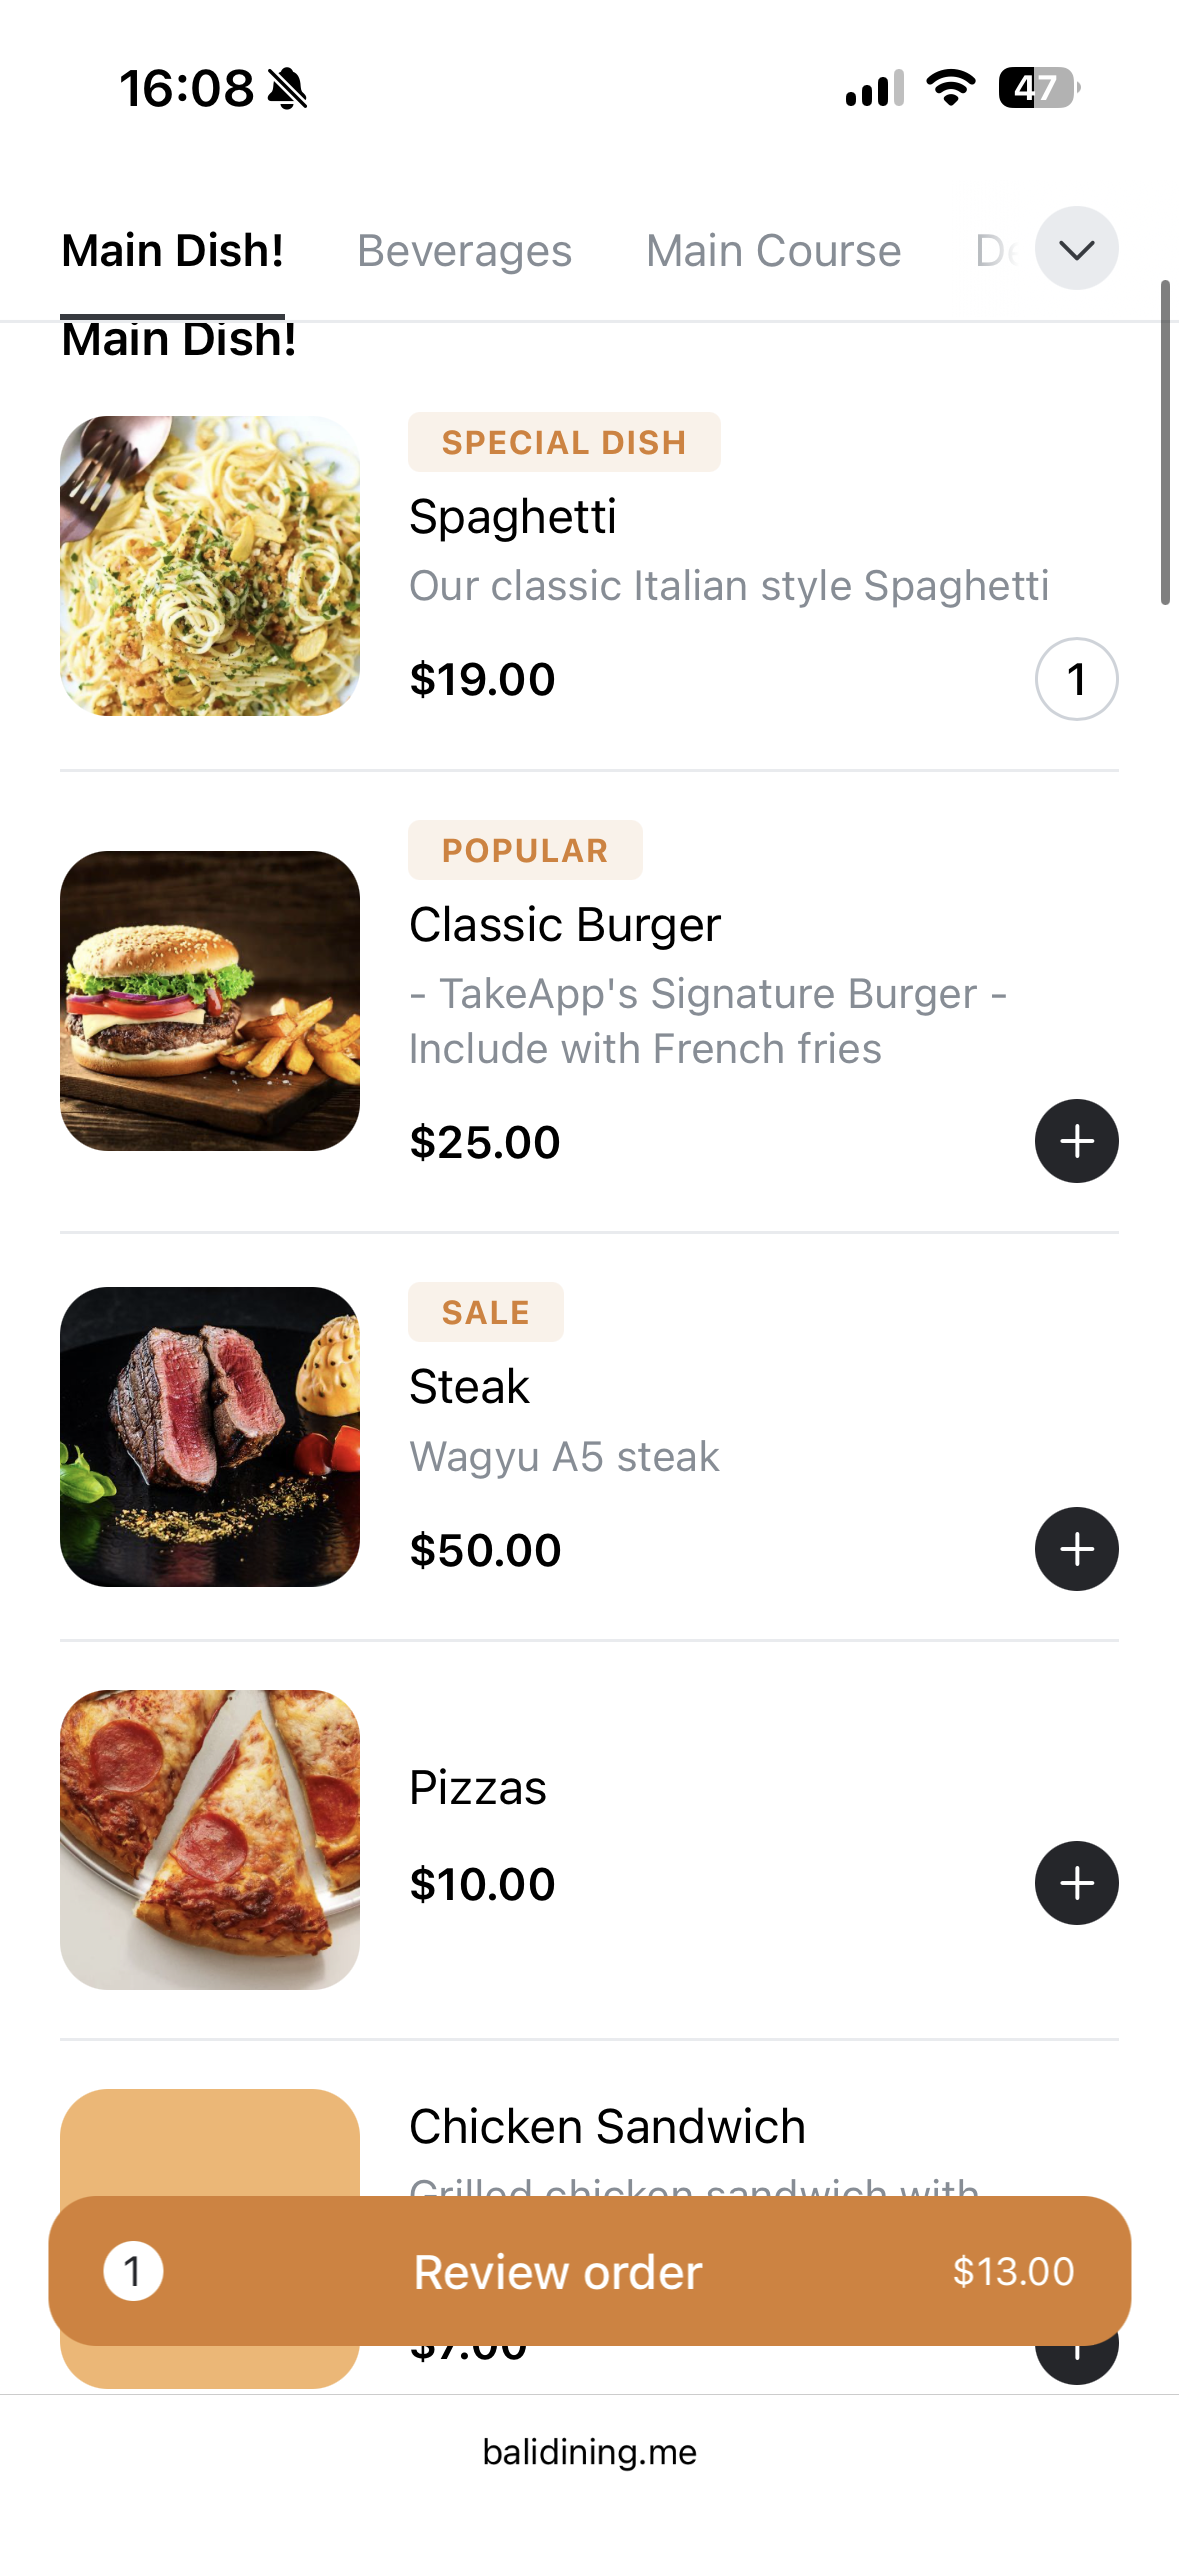 | 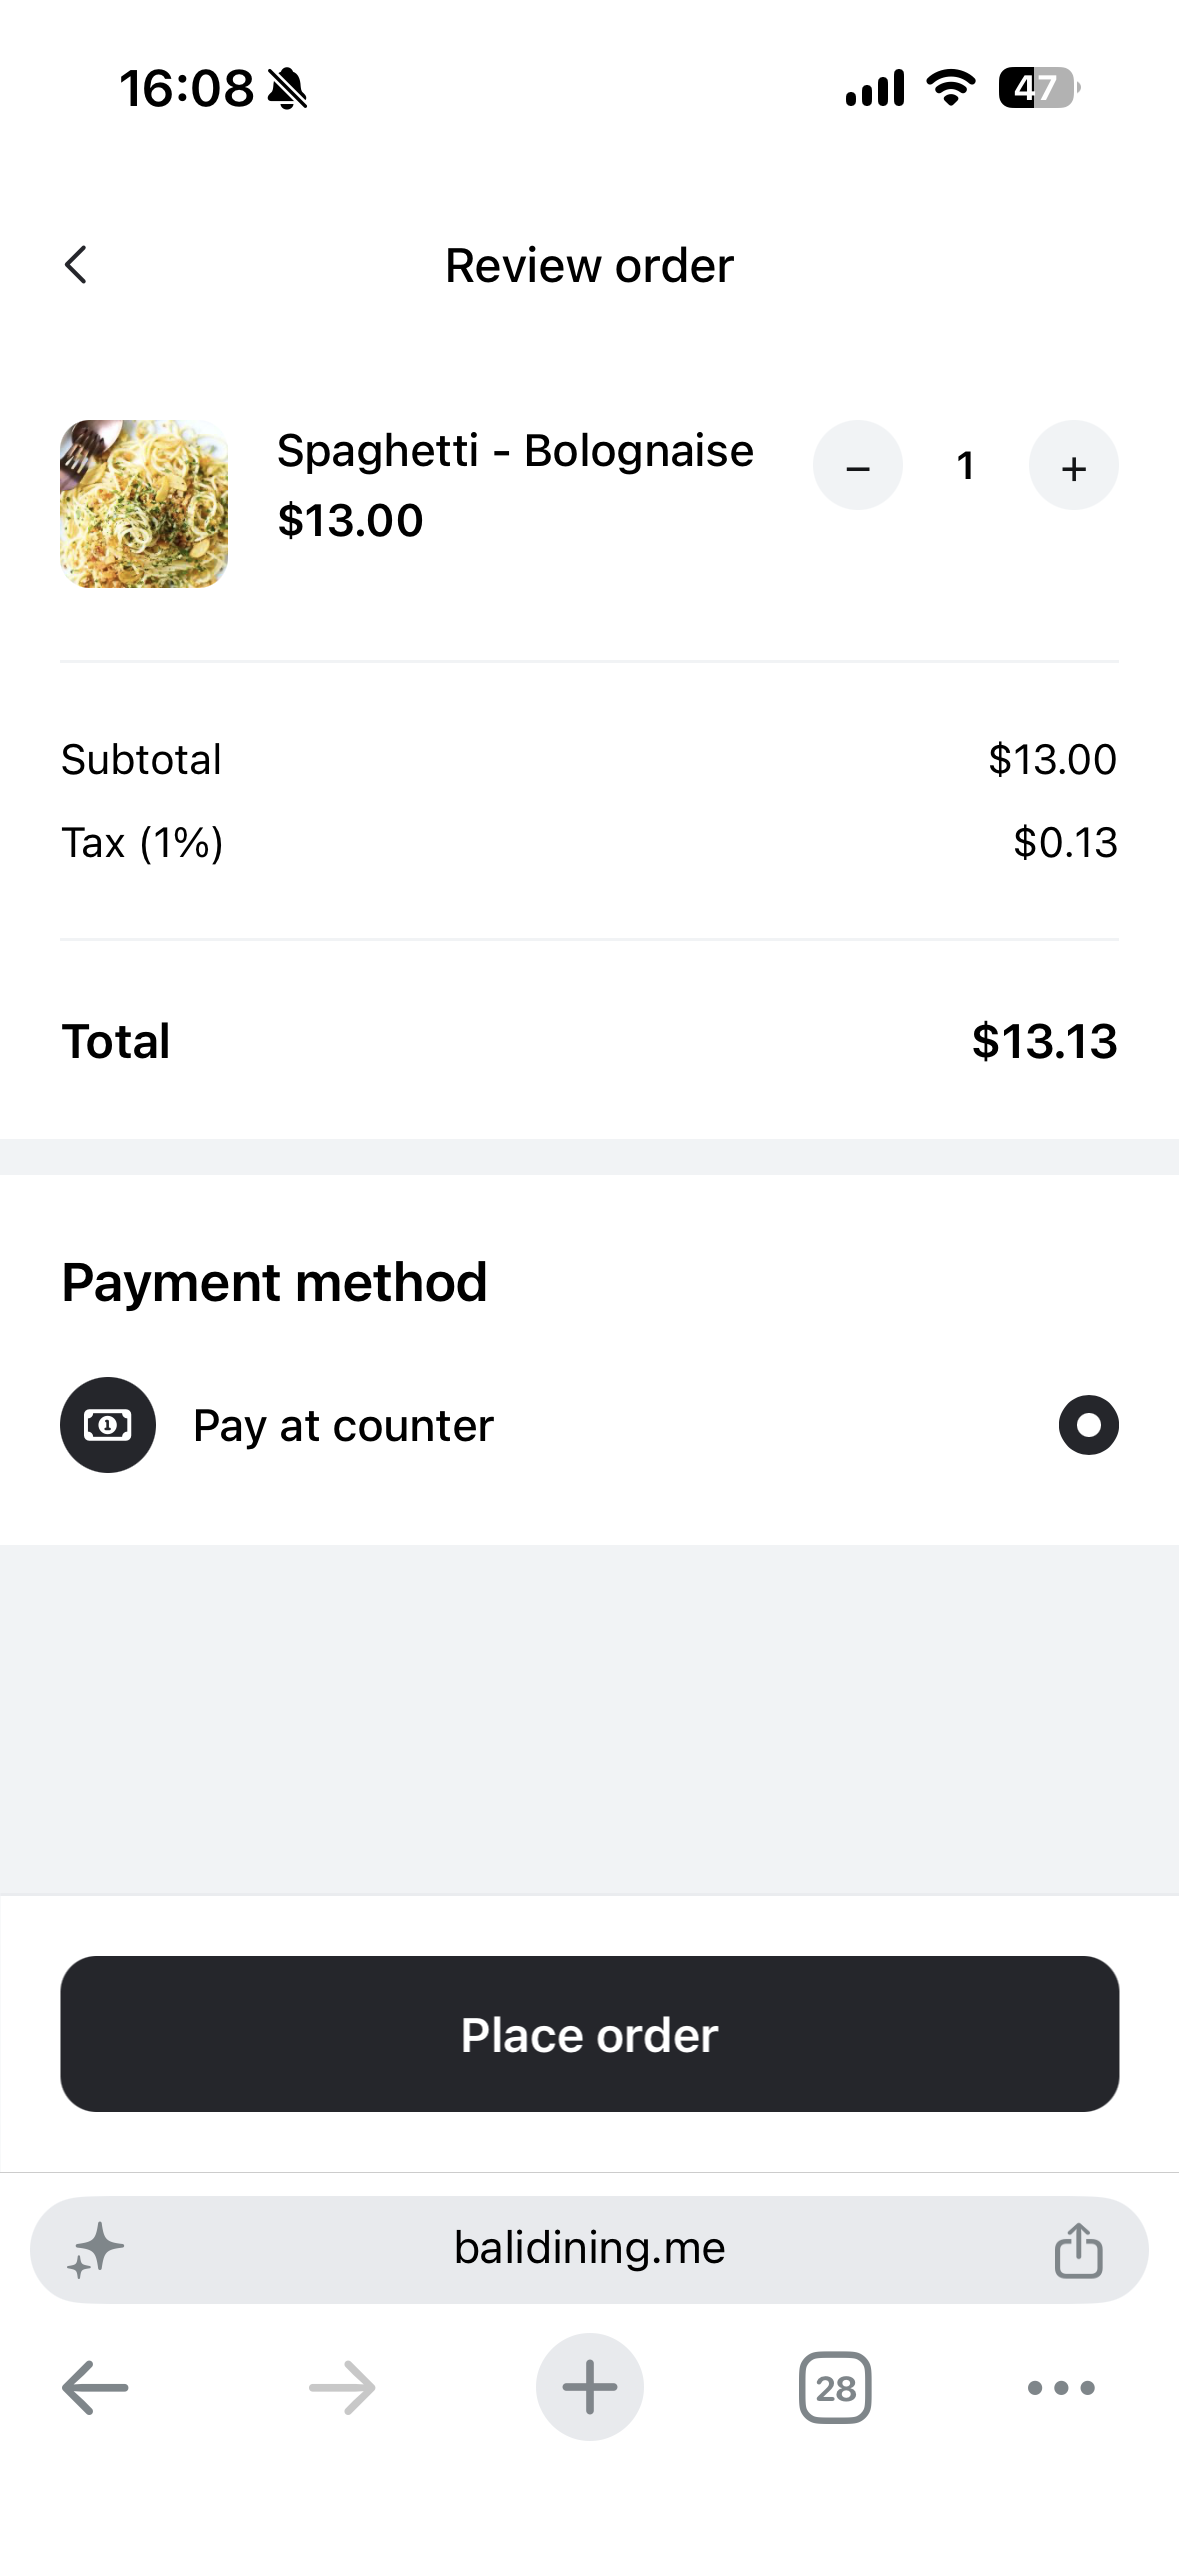 | 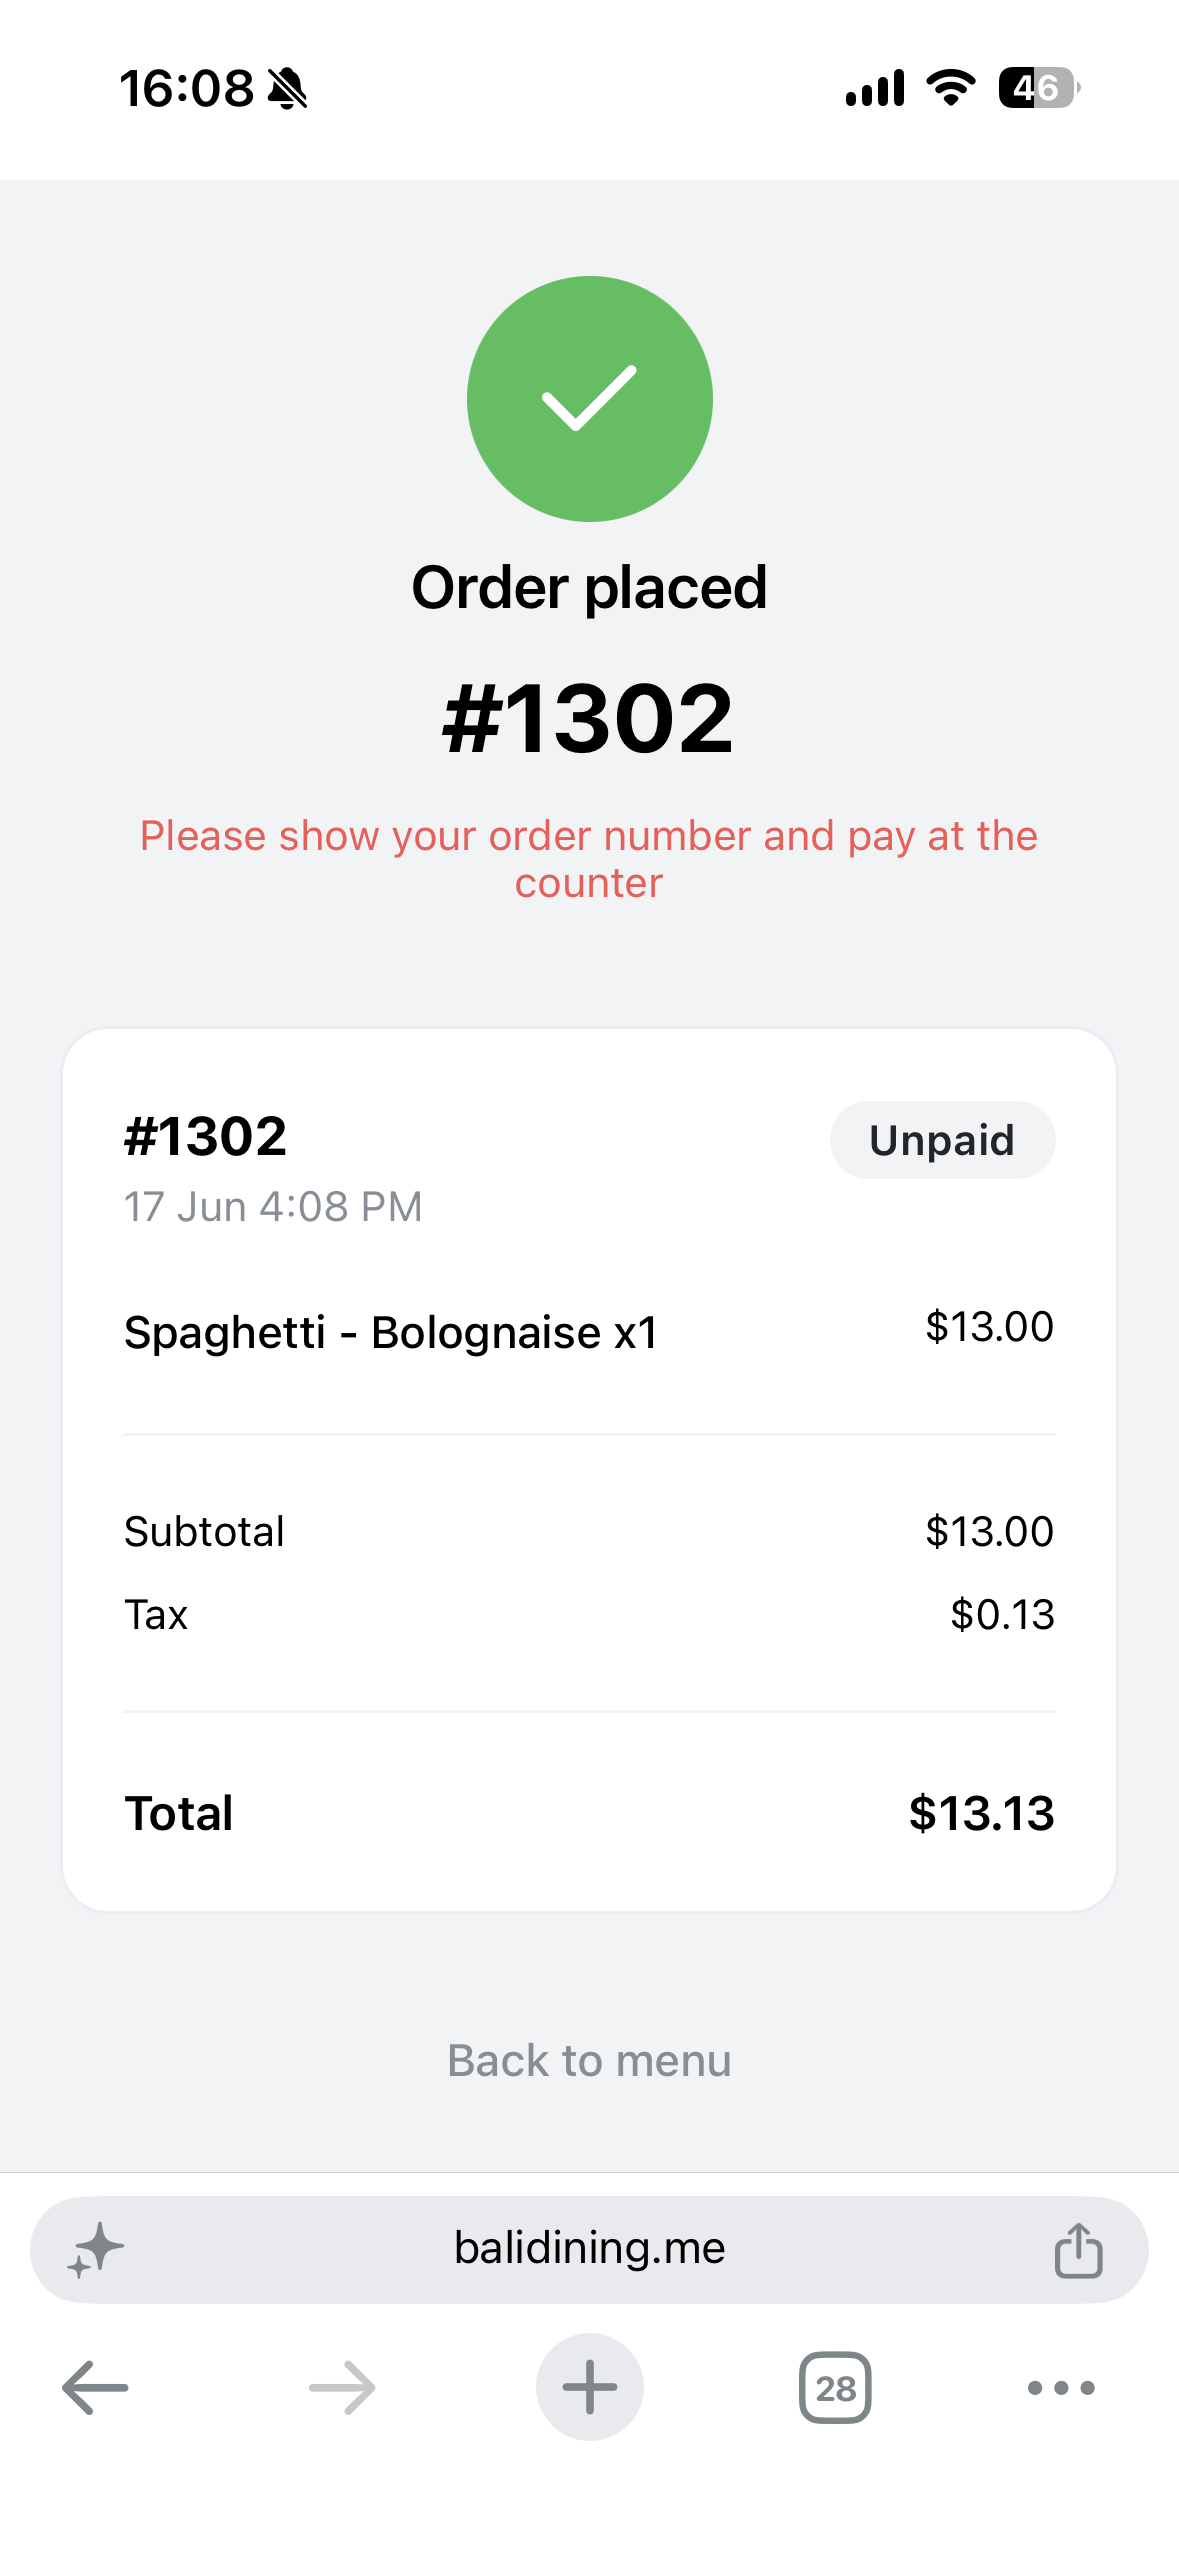 | 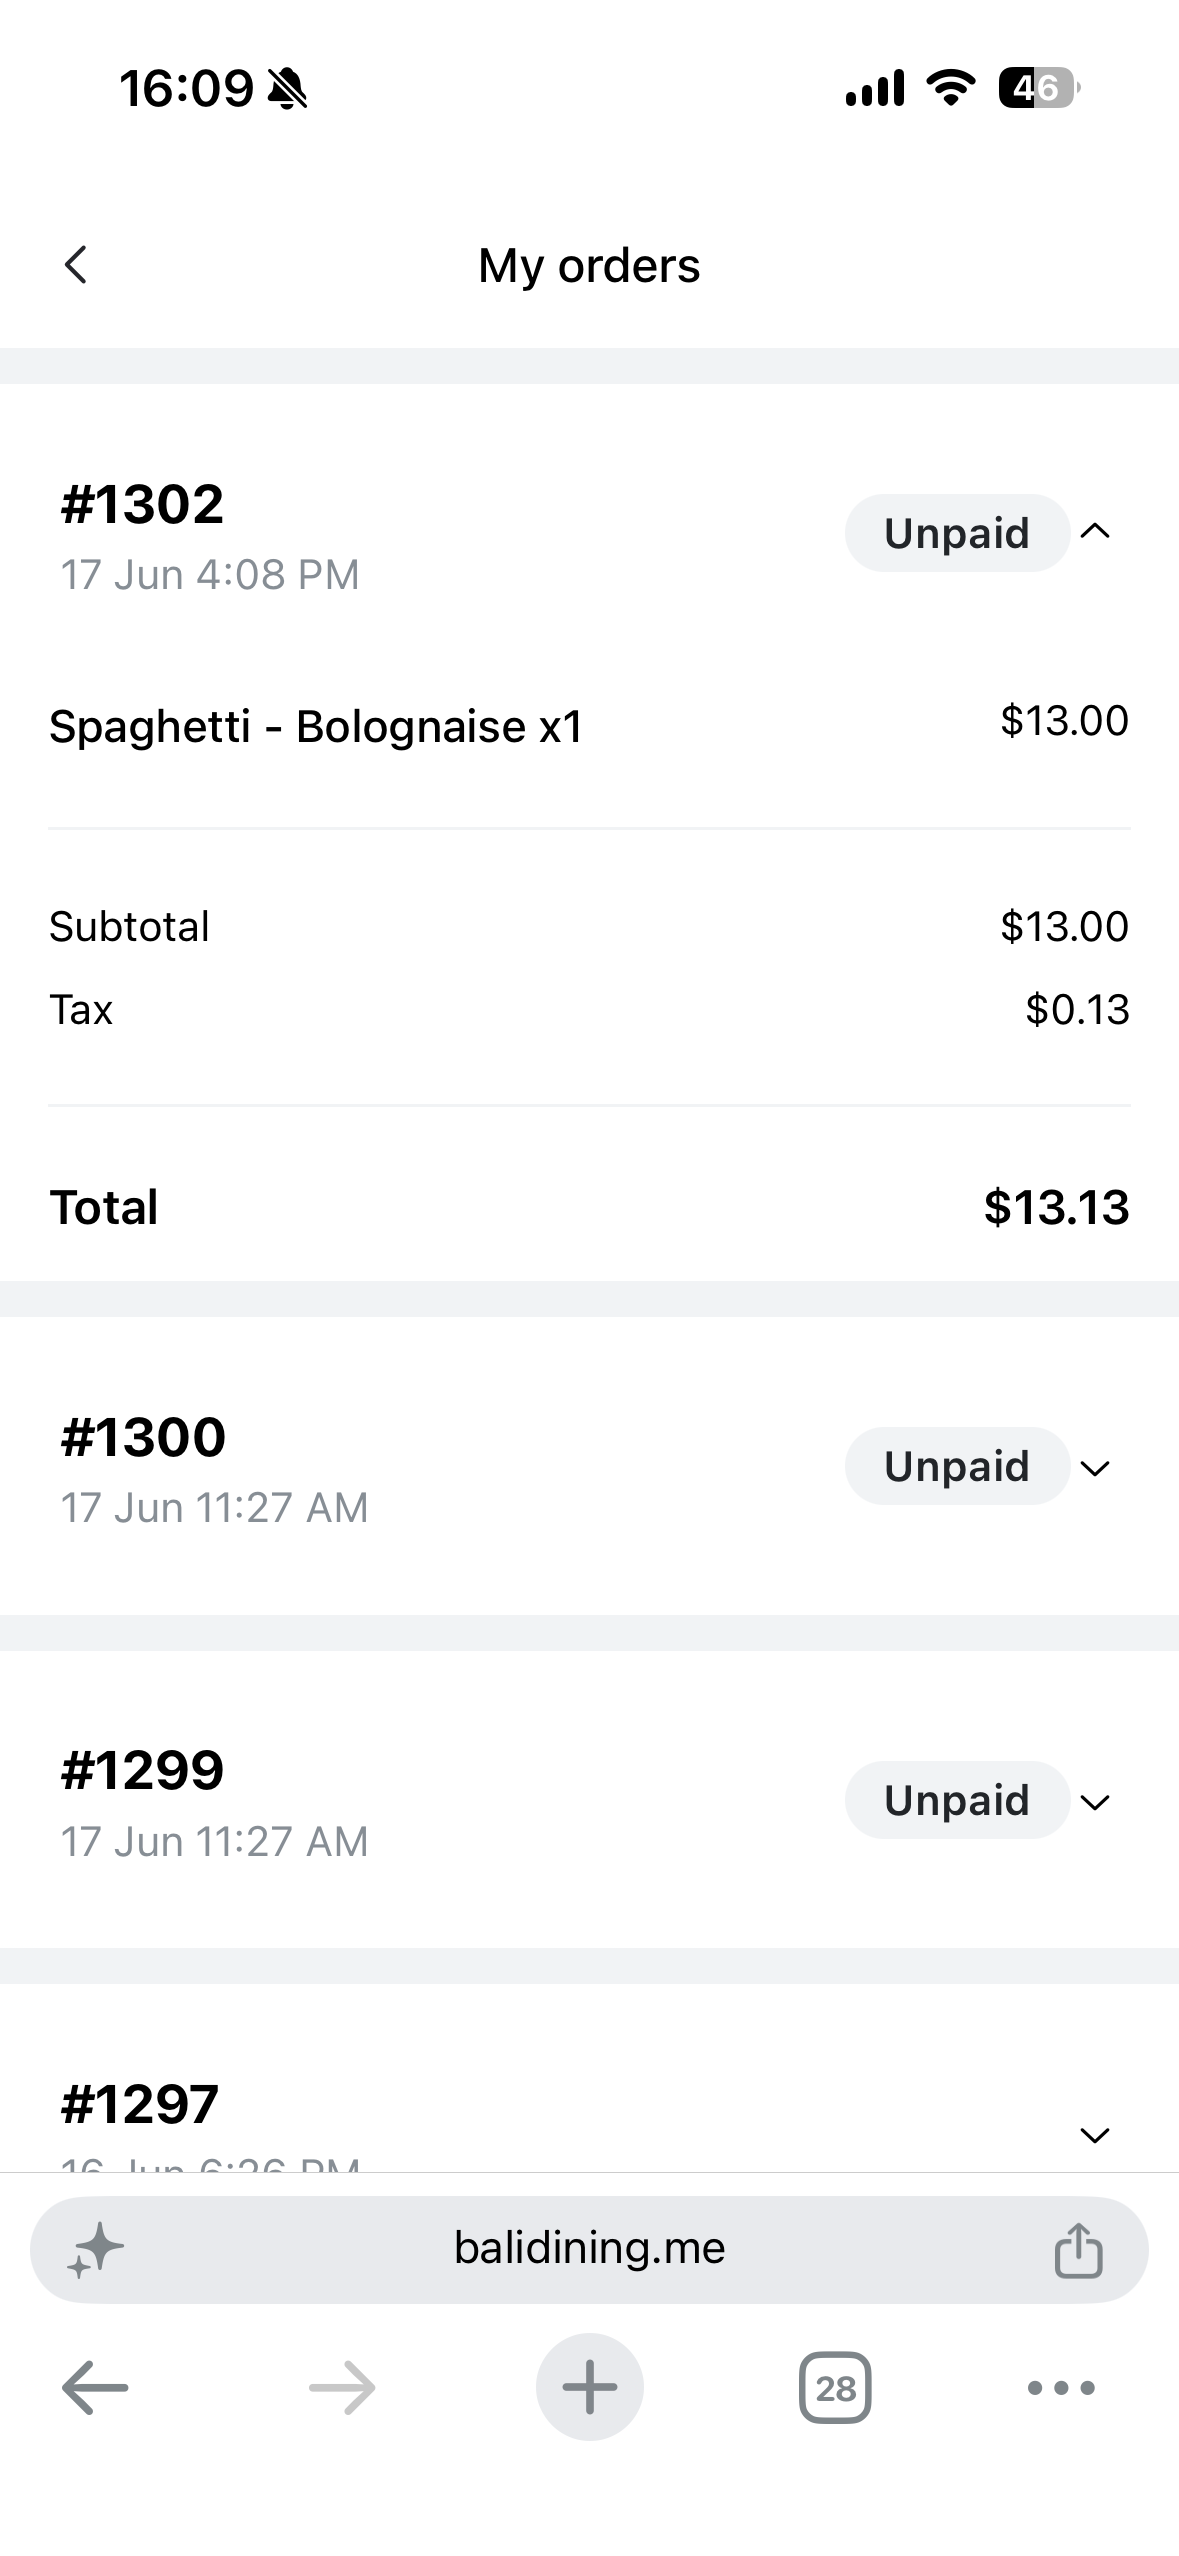 |
Open your dine-in menu from the POS app
If you use the Take App POS app on your phone, you can now open your dine-in order menu directly from the app — no need to look up the link in admin first.
- Open the Take App POS app on your phone.
- Go to Settings → Online store / QR menu → QR order menu.
- Your dine-in ordering menu opens in the browser. Staff can preview or share the experience with customers on the spot.
Show your menu on a TV
Your store has a screen at take.app/your-store/tv that cycles through your menu with a Scan to order QR code. Open it in a TV's browser, set it to full screen and turn off the screensaver. The screen refreshes itself every 10 minutes, so price changes and sold-out items reach it on their own.
- Go to Admin > Dine-in > QR ordering and find
TV screen. - Choose a mode:
Menu boardshows a category per screen;Product highlightshows one product at a time. - Pick the screen shape (match the screen, landscape or portrait), the colour (dark or light), whether to show photos, and the seconds per screen. The preview updates as you change them.
- Click
Openon the TV, or copy the link. The link carries your settings, so different TVs can run different boards.
Click anywhere on the screen or press the space bar to skip to the next slide.
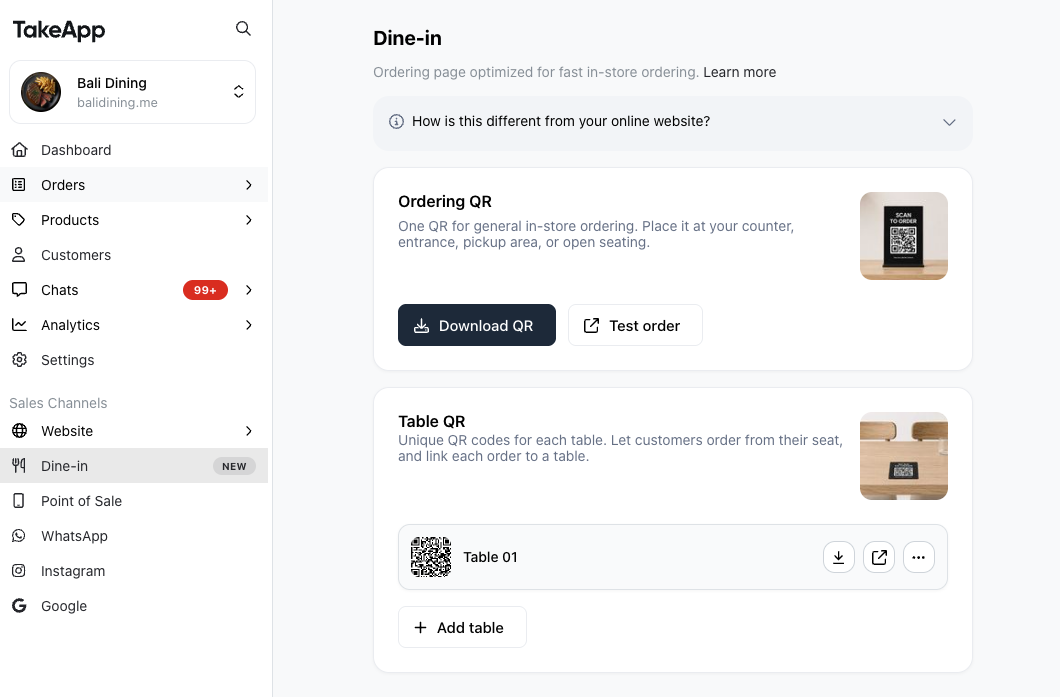
A QR code per table
Table QR builds on the dine-in QR code: each table gets its own code, and orders come in tagged with the table they were placed from.
-
Under Admin > Dine-in > QR ordering, click
+Add tableand add as many tables as you need, then download the QR code for each one. Each table's QR opens your menu with that table attached (link format:take.app/menu?tableId=xxxx).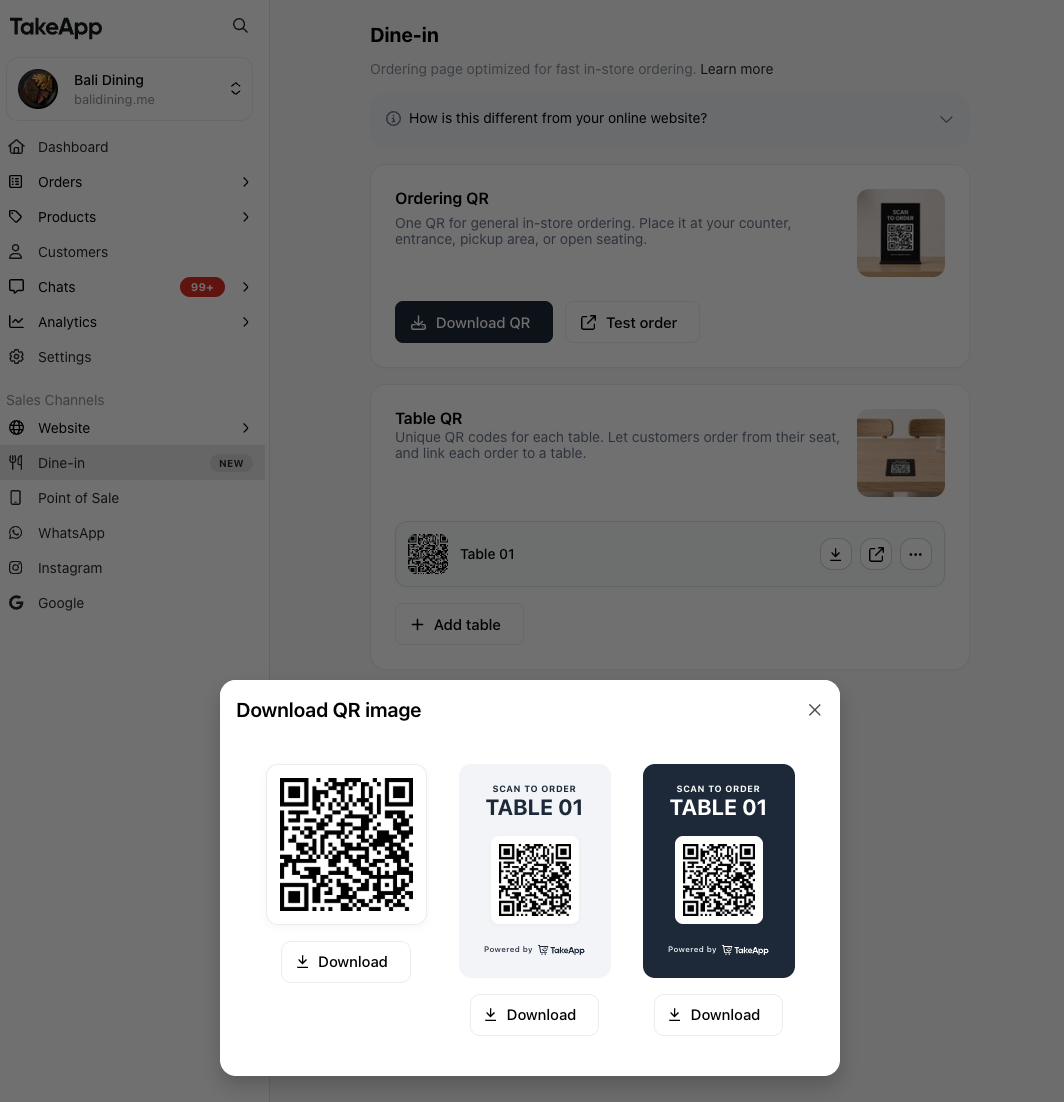
-
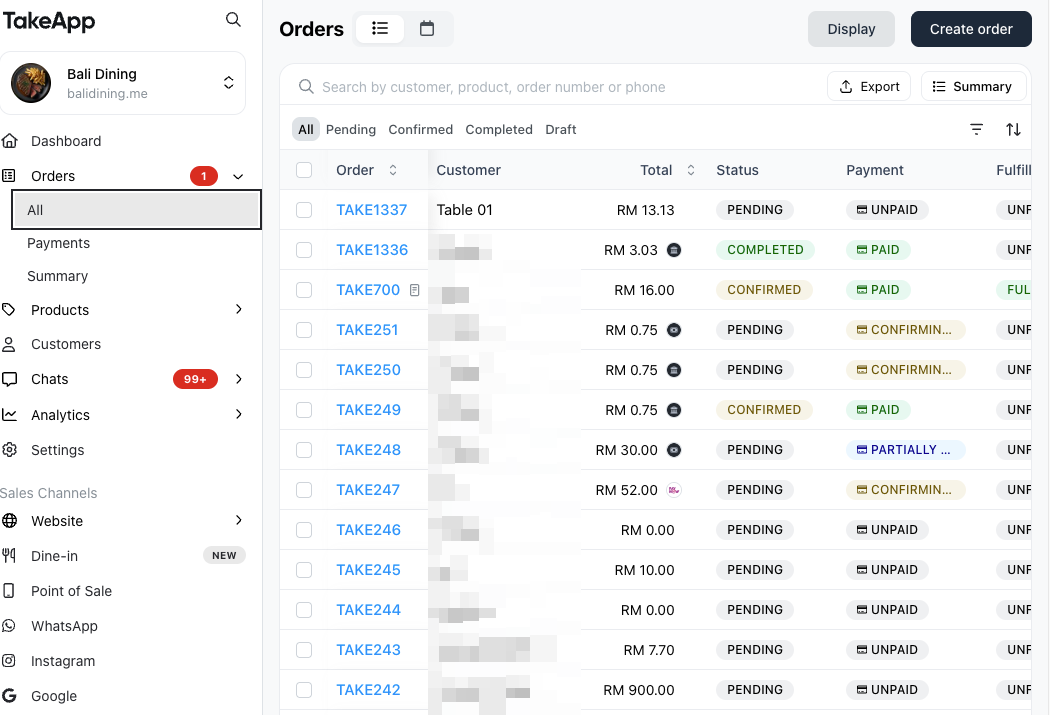
When a customer scans a table's QR and orders, the order carries the table as its own field — it is no longer written into the customer name. No customer account is created. The table name shows as a badge beside the order number on desktop Orders, after the order and payment statuses on mobile, and after the order status on the kitchen display. Long names wrap or truncate.
-
The table is also named on the order detail page beside the date, under the order number on the QR order pages and in My orders, as a Table line on printed receipts, PDFs and the mobile thermal receipt, in the order message sent over WhatsApp, SMS or email, and in the new-order push notification.
-
You can see which table placed each order, and when.
Let diners leave their name
On the review screen, before placing the order, there is an Add your details section with a name and a WhatsApp number. It is closed by default, so ordering without giving anything stays a single tap, and both fields are optional. What a diner types is kept separate from the table, so an order can arrive as both Table 5 and the person who placed it — useful for calling out an order, or reaching the diner about it.
Ordering by multiple people at the same table through a single QR code is not fully supported yet.
Show your menu on a shop TV
On the same QR ordering page, the TV screen card builds a full-screen menu board you open in a TV browser. See TV menu board.
For table bookings, see Reservations under Admin > Dine-in > Reservations.